반응형
앞의 내용에 이어서 Raspberry Pi Pico & WIZnet Ethernet HAT Ping test 2
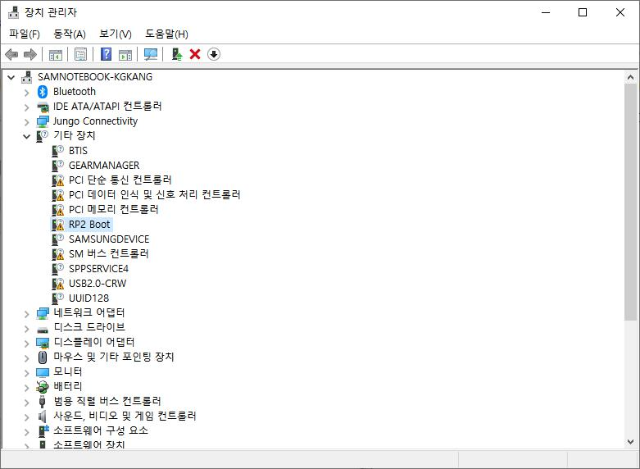
WIZnet W5100S-EVB-Pico를 연결하면 아래와 같이 RP2 Boot 가 장치관리자에 보인다.
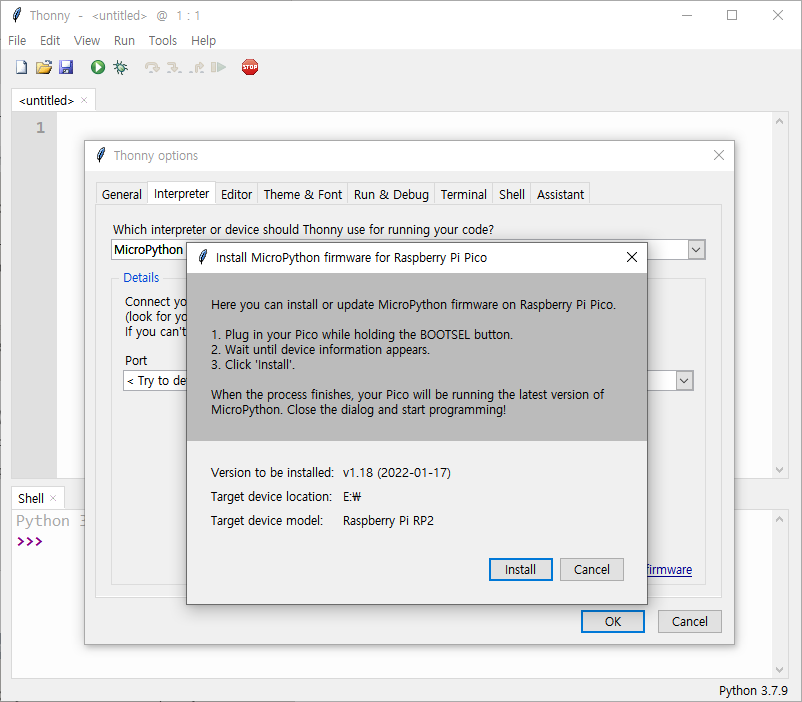
Thonny를 실행하고 Tools - Options... 의 Interpreter tab 선택.

MicroPython (Raspberry Pi Pico)를 선택하고 "Install or update firmware" 선택.
Install을 눌러서 설치를 완료한다.

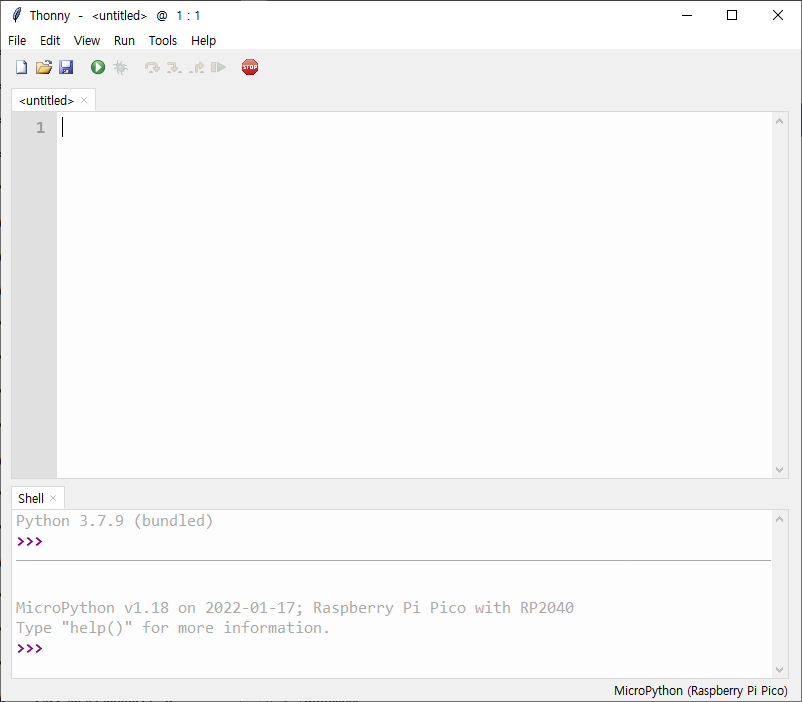
그러면 위와 같이 Shell 이 나타난다.
여기에 Python 코드를 입력하여 테스트를 해 볼 수 있다.
아래 링크에 나와 있는데로 테스트를 해 볼 수 있다.
https://projects.raspberrypi.org/en/projects/getting-started-with-the-pico/4
Projects | Computer coding for kids and teens | Raspberry Pi
Computer coding for kids, teenagers and young adults. Step-by-step instructions for 250+ free coding projects. Create games, animations, and more with code.
projects.raspberrypi.org
참고로 아래와 같이 간단히 출력 테스트를 해 볼 수 있다.

728x90
반응형
'공부 > HW' 카테고리의 다른 글
| 220412 Raspberry Pi Pico & WizNet W5100S-EVB-Pico 개발 환경 (0) | 2022.04.12 |
|---|---|
| 220411 Raspberry Pi Pico & WIZnet Ethernet HAT Ping test 3 (0) | 2022.04.11 |
| 220411 Raspberry Pi Pico & WIZnet Ethernet HAT Ping test 1 (0) | 2022.04.11 |
| 220214 라즈베리파이3 python 소켓 프로그램 (0) | 2022.02.23 |
| 220222 Windows10 ping 설정 (0) | 2022.02.22 |